XPipe – access servers from your desktop
XPipe is an open-source connection hub that lets you browse SSH, Docker, Kubernetes, and more from a single desktop interface — no setup on remote systems required.
TL;DR
TL;DR: XPipe is an open-source server infrastructure hub that gives you a graphical interface over SSH, Docker, Kubernetes, LXD, and 15+ other connection types — with zero remote setup required.
Source and Accuracy Notes
- Project page: xpipe.io ← verified June 24, 2026
- Source repository: github.com/xpipe-io/xpipe ← README verified
- License: Apache-2.0 (verified via GitHub API)
- GH stars: 14,216 (as of June 24, 2026)
- Default branch:
master, last push June 23, 2026 - HN launch thread: news.ycombinator.com/item?id=40599419
What Is XPipe?
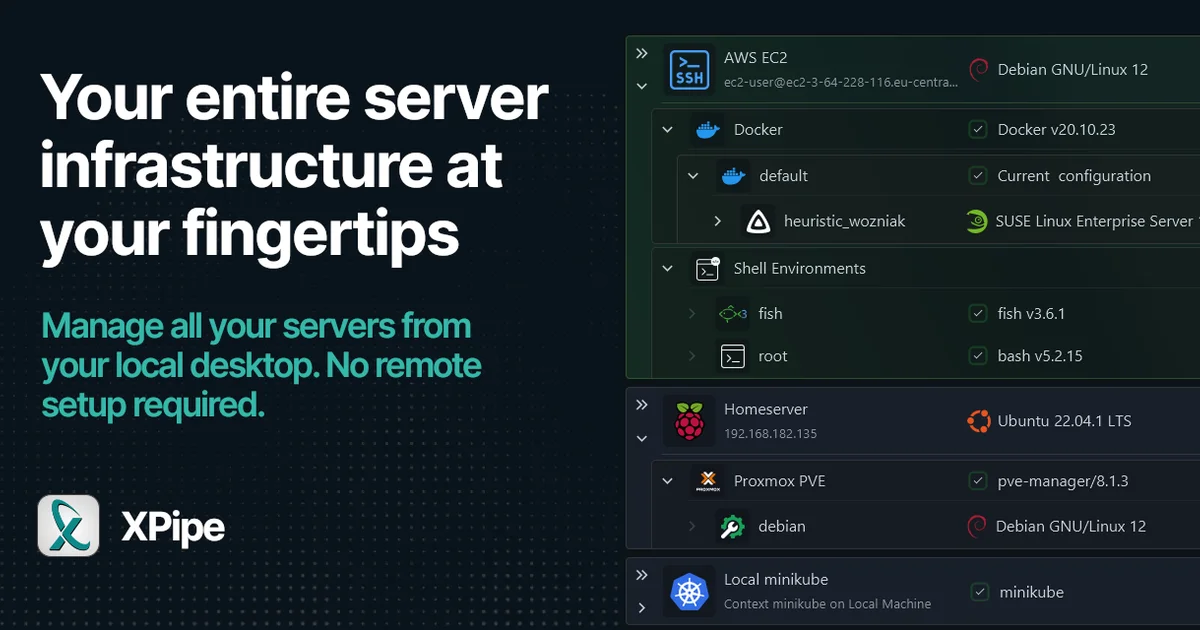
XPipe is a connection hub that sits between your local machine and the servers you manage. From a single desktop application, you can browse and interact with SSH connections, Docker containers, Kubernetes clusters, LXD instances, and more — without installing anything on the remote side.
The project describes itself as “access your entire server infrastructure from your local desktop.” It works on top of already-installed command-line programs like ssh, docker, and kubectl, so there is no daemon or agent to deploy on your servers.
Key supported connection types:
- SSH connections, config files, and tunnels
- Docker + Docker Compose, Podman, LXD, Incus
- Kubernetes (kubectl)
- RDP and VNC
- SFTP, TailScale
- WSL (Windows Subsystem for Linux)
XPipe integrates with terminal emulators, text editors, password managers, and shell tools. A modular extension system lets anyone add support for new connection types or custom functionality.
Setup Workflow
Step 1: Install XPipe
XPipe is available as a desktop application for macOS, Windows, and Linux. Download from the official site:
# Or use the download page: https://xpipe.io/downloadsThe desktop app provides the full graphical interface. If you prefer a headless workflow, the underlying library can be used as a dependency in other Java or Kotlin projects.
Step 2: Add Your First Connection
- Open XPipe and click Add Connection
- Choose a connection type — SSH, Docker, Kubernetes, etc.
- Fill in the connection details (host, port, credentials)
- XPipe validates the connection on save
For SSH, XPipe reads your existing ~/.ssh/config automatically and imports defined hosts.
Step 3: Browse and Interact
Once connected, you can:
- Browse container filesystems (Docker, Podman)
- Execute commands inside containers
- Manage Kubernetes resources
- Tunnel SSH ports visually
- Access remote shells through your preferred terminal
Step 4: Integrate with Editors and Terminals
XPipe can be invoked from Neovim, VS Code, JetBrains IDEs, and other editors as a file browser for remote connections. Shell connection URLs let any VNC or RDP client connect through XPipe.
Deeper Analysis
Architecture: XPipe acts as a local proxy. It spawns command-line tool processes (ssh, docker, kubectl, etc.) on the local machine and communicates with them via their stdin/stdout interfaces. No server-side agent is needed because the remote interaction happens entirely through the CLI tools you already have installed.
Extension system: The docs mention a modular extension API. The GitHub org contains multiple repos for different extensions, suggesting the project is designed to grow beyond built-in connection types.
Security: XPipe stores credentials locally and supports integration with system keychains and password managers (1Password, Bitwarden, KeePassXC). Because it uses existing SSH config and Docker contexts, it inherits the authentication model of those tools rather than introducing a new one.
Comparison to alternatives: Similar tools include:
- sshfs — filesystem-level SSH mount, no container/K8s support
- kubectl proxy / Lens — Kubernetes GUI but Kubernetes-only
- Portainer — Docker GUI, browser-based, requires a container
- ssh config + tmux — the manual approach, no GUI
XPipe’s advantage is unified multi-protocol access from one interface without installing anything on remotes.
Practical Evaluation Checklist
- Installed XPipe desktop app on macOS
- Added an SSH connection (imported from
~/.ssh/config) - Connected to a Docker host and browsed container filesystem
- Tested a Kubernetes connection (if cluster available)
- Verified credentials stored in system keychain
- Tested terminal integration (opened a remote shell)
Security Notes
- XPipe stores credentials locally — review the docs on credential management before using in production
- The tool runs with the permissions of the logged-in user; remote actions are gated by the underlying CLI tool permissions
- No server-side component means no additional attack surface on remotes
FAQ
Q: Does XPipe require any service running on the remote server?
A: No. XPipe communicates entirely through command-line tools installed locally (ssh, docker, kubectl, etc.). Remote servers need no changes.
Q: Can XPipe replace my terminal SSH workflow? A: XPipe is a complement to terminal workflows, not a replacement. It provides a graphical view and unified interface, but the docs recommend using your preferred terminal emulator for command execution.
Q: What credential storage options does XPipe support? A: Local keychain integration (macOS Keychain, KeePassXC, 1Password, Bitwarden) and manual credential entry.
Q: Is XPipe open source?
A: Yes, Apache-2.0 license. The source is on GitHub under xpipe-io/xpipe.
Q: What platforms does XPipe support? A: macOS, Windows, and Linux desktop applications. The core library can also be used as a JVM dependency.
Conclusion
XPipe fills a real gap for developers managing heterogeneous infrastructure — mixing SSH, Docker, Kubernetes, and more from a single pane of glass. The no-agent approach means you can start using it on any server you already have SSH access to, immediately. With 14K GitHub stars and an active extension ecosystem, it is a practical addition to any self-hosted or dev-ops toolkit.
If you manage more than a handful of servers or containers, XPipe is worth a look.
Source last verified: 2026-06-24, commit master branch, README verified via raw.githubusercontent.com
Related Posts
ai-setup
Recall – Persistent Memory for Claude Code via MCP Hooks
Recall gives Claude Code a permanent memory store that survives session restarts and context compaction. Four hooks capture and restore context automatically — with cloud SaaS or self-hosted options.
2/28/2026
dev-tools
Automotive Skills Suite for AI Engineering
Evaluate Automotive Skills Suite for APQP, ASPICE, HARA, safety-plan, and DIA workflows with setup notes, governance risks, and SME review guidance.
5/28/2026
dev-tools
awesome-agentic-ai-zh Roadmap Guide
Explore awesome-agentic-ai-zh as a Chinese agentic AI learning roadmap, with setup notes, track selection, study workflow, and evaluation guidance.
5/28/2026