ViewComfy – Turn ComfyUI Workflows into Web Apps
Open-source tool that wraps ComfyUI workflows in clean web apps with input editors, user management, and serverless deployment – no UI code required.
TL;DR
TL;DR: ViewComfy is an open-source tool that converts ComfyUI workflows into production-ready web applications with built-in input editors, user management, and serverless deployment options.
Source and Accuracy Notes
- Project page: viewcomfy.com
- Source repository: github.com/ViewComfy/ViewComfy
- License: AGPL-3.0 (verified via GitHub API
license.spdx_id) - HN launch thread: news.ycombinator.com/item?id=42102267
What Is ViewComfy?
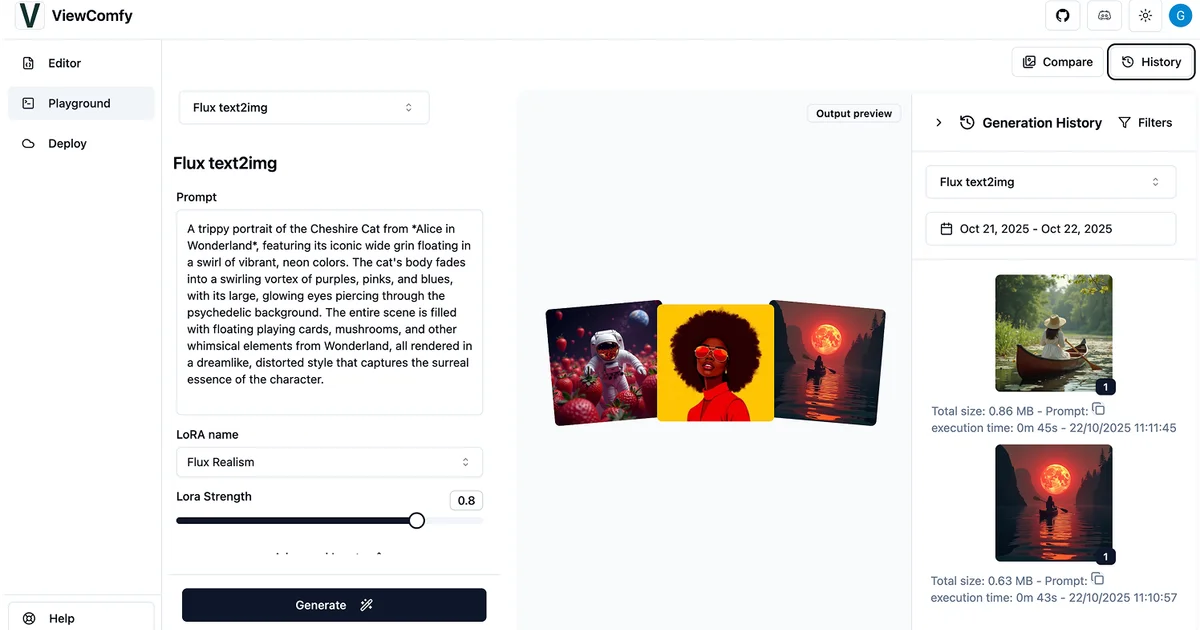
Building a UI for a ComfyUI workflow usually means writing boilerplate: forms, validation, API routes, user auth. ViewComfy automates that layer. You drop in your workflow’s workflow_api.json file and get a clean web interface with configurable input controls, output history, and optional serverless deployment.
The project has two parts:
- ViewComfy (open source) – wraps ComfyUI workflows in clean, user-friendly interfaces. Host it yourself or use ViewComfy Cloud.
- ViewComfy Cloud – managed deployment with built-in user management, billing tracking, and shareable email links.
Setup Workflow
Prerequisites
- Node.js v20.18 or later (recommended v20.18)
- A ComfyUI instance (local or cloud deployment)
- A
workflow_api.jsonfile exported from ComfyUI
Step 1: Clone and Install
git clone https://github.com/ViewComfy/ViewComfy.git
cd ViewComfy
npm install
npm run dev
```bash

The dev server starts at `http://localhost:3000` by default.

### Step 2: Load Your Workflow

Open the form editor and drag-and-drop your ComfyUI `workflow_api.json` file into the window. ViewComfy auto-generates a form based on the workflow's input nodes.

Supported input types include text, numbers, dropdowns, sliders, checkboxes, images, video, and audio. Each input can be marked required or optional, with helper text for guidance.

### Step 3: Configure the Input Editor

Customize how each workflow input appears in the app. For example, expose a seed slider with a min/max range, or replace a raw text prompt field with a dropdown of preset prompts.

### Step 4: Connect to ComfyUI

Point ViewComfy at your ComfyUI instance. For local setups, add your endpoint and API keys to the `.env` file:

```bash
.env file ->
VIEWCOMFY_CLIENT_ID="<your client id>"
VIEWCOMFY_CLIENT_SECRET="<your client secret>"
For cloud deployments, the endpoint is configured through the ViewComfy Cloud dashboard by dropping the viewcomfy.json file into the Apps tab.
Step 5: Deploy
The simplest path is ViewComfy Cloud – it handles infrastructure, user auth, and billing out of the box.
For self-hosting, the repo includes deployment examples for Modal in hosting-examples/modal/. The app itself is a Node.js application that connects to your ComfyUI serverless endpoint.
Deeper Analysis
What Makes It Different
ComfyUI is powerful but its native UI is a node graph. For sharing workflows with non-technical users, that graph is a barrier. ViewComfy replaces it with a standard web form while keeping all of ComfyUI’s pipeline intact.
The key differentiator from building a custom web UI is speed: no form scaffolding, no API glue code, no auth boilerplate. The workflow_api.json is the contract.
Input Editor Capabilities
The input editor supports complex workflow behaviors through workflow routing, optional images, and custom validation with user-facing error messages. This is powered by the companion ViewComfy Utils node pack.
Cloud vs. Self-Hosting
ViewComfy Cloud adds user management, output history, an app hub, usage analytics, and shareable email links. Self-hosting gives you the core form-to-workflow functionality without those extras. The core ViewComfy package is the same in both cases.
Practical Evaluation Checklist
- Works with image, video, and text outputs from ComfyUI
- Supports multiple workflows in the same UI
- Input types: text, number, dropdown, slider, checkbox, image, video, audio
- Required and optional input fields with helper text
- Mask editor for image inputs
- Built-in output history (ViewComfy Cloud)
- User management and analytics (ViewComfy Cloud)
- Self-hostable via Node.js
- Serverless API deployment option
- License: AGPL-3.0
Security Notes
- API credentials for self-hosted deployments are stored in the
.envfile and never exposed to the client-side app - ViewComfy Cloud handles its own auth and billing infrastructure; review their privacy policy for data handling
- For enterprise self-hosting, ensure your ComfyUI endpoint is behind appropriate network controls
FAQ
Q: Does ViewComfy require ComfyUI to be running? A: Yes. ViewComfy is a frontend interface that sends requests to a running ComfyUI instance (local or serverless). It does not embed or run ComfyUI itself.
Q: Can I use ViewComfy without deploying to ViewComfy Cloud? A: Yes. The core ViewComfy package is open source under AGPL-3.0 and can be self-hosted. You connect it to your own ComfyUI endpoint.
Q: What input types does ViewComfy support? A: Text, numbers, dropdowns, sliders, check boxes, images, video, and audio. Inputs can be required or optional with helper text.
Q: Is this related to the ComfyUI project itself? A: No. ViewComfy is an independent open-source project. It is not affiliated with the ComfyUI maintainers.
Q: How does it handle multiple workflows? A: Multiple workflows can be managed in the same ViewComfy UI. Each workflow gets its own app configuration and endpoint.
Conclusion
ViewComfy fills a specific gap in the ComfyUI ecosystem: turning a workflow node graph into something a non-technical user can actually interact with. If you’ve built a ComfyUI pipeline and want to share it as a web app without writing form code, it is worth a look.
The open-source core handles the essentials. If you need user management, billing, and hosted infrastructure, ViewComfy Cloud adds those on top.
- GitHub: github.com/ViewComfy/ViewComfy
- Docs: docs.viewcomfy.com
- HN Thread: news.ycombinator.com/item?id=42102267
Related Posts
ai-setup
Recall – Persistent Memory for Claude Code via MCP Hooks
Recall gives Claude Code a permanent memory store that survives session restarts and context compaction. Four hooks capture and restore context automatically — with cloud SaaS or self-hosted options.
2/28/2026
dev-tools
Automotive Skills Suite for AI Engineering
Evaluate Automotive Skills Suite for APQP, ASPICE, HARA, safety-plan, and DIA workflows with setup notes, governance risks, and SME review guidance.
5/28/2026
dev-tools
awesome-agentic-ai-zh Roadmap Guide
Explore awesome-agentic-ai-zh as a Chinese agentic AI learning roadmap, with setup notes, track selection, study workflow, and evaluation guidance.
5/28/2026